


Wasp nest macro photography – Exploring the interior of a nest – Watch on YouTube
Photographing the inside of a wasp nest reveals a hidden structure that most people never see. What appears from the outside to be a simple papery shell becomes, under controlled macro lighting, a complex and geometric construction. The layers, textures, and repeating forms make abandoned wasp nests a surprisingly rich subject for macro photography.
This guide focuses on photographing an abandoned nest using controlled macro lighting. It explains how to approach the subject safely, how to reveal surface texture, and how to use light creatively to explore the internal structure without damaging it.

Ethics & Safety
Only abandoned nests should ever be photographed. Active wasp nests are dangerous and should not be disturbed. Even recently vacated nests can still pose a risk, so time and caution are essential.
An abandoned nest is usually very dry, light, and fragile. The material crumbles easily and produces dust when handled. This fragility is part of what makes the subject interesting, but it also means that slow, deliberate handling is essential. Working gently protects the structure and allows repeated compositions without destroying the subject.
Respect for the ecosystem matters. The aim is to document and explore a structure that already exists, not to remove or damage nests purely for photography.

Understanding the structure before shooting
Before lighting or dismantling anything, it helps to spend time observing the nest as a physical object. A wasp nest is built in layers over time, using fibres gathered from different sources. These layers create subtle changes in colour and texture across the surface.
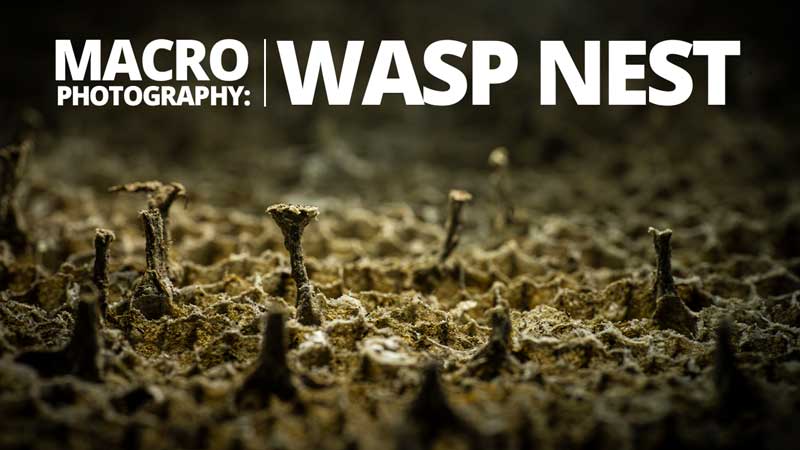
Internally, the nest is made up of stacked cell structures. These cells vary slightly in size and height, creating natural depth and rhythm. Knowing this helps guide lighting decisions later, especially when working at very close distances.

Photographing the exterior surface
The outer surface of a wasp nest can be easily overlooked, but it offers some of the most interesting textures. The material feels soft and fabric‑like rather than hard or protective. Under macro lighting, the surface reveals fibres, construction lines, and layered patterns that resemble geological strata.
White, diffused light is ideal for this stage. It preserves natural colour and avoids introducing harsh highlights. Using opposing lights creates an even, documentary look that clearly shows texture without deep shadows.
Once the surface has been documented, reducing the setup to a single diffused light adds depth. Directional light exaggerates the layered construction lines and reveals small imperfections, tears, and edges. This approach works well for abstract compositions that focus on pattern rather than scale.

Revealing depth inside the nest
The internal cell structures respond particularly well to grazing light. Placing a diffused light low and close to the surface allows light to skim across the tops of the cells. This emphasises height differences and creates soft shadows that define individual forms.
A second light can be used to gently lift shadows in the background or illuminate deeper cavities. The goal is not to eliminate shadows completely, but to control them so that depth remains visible without losing detail.
Viewed from above, these structures can resemble aerial landscapes. Slight changes in camera angle transform the image from a recognisable honeycomb pattern into something more abstract and architectural.

Using perspective to change the image
Shooting straight down into the cells produces a clean, graphic result. This works well when the intention is to show structure clearly. However, angling the camera even slightly introduces perspective and scale.
An angled view allows light to fall into the cells at different depths, creating variation across the frame. Some cells catch highlights while others remain in shadow. This balance makes the image feel more three‑dimensional and less diagrammatic.
Plain white diffused light is particularly effective here, as it allows form and shadow to define the image without colour distraction.

Backlighting and translucency
One of the most effective techniques when photographing a wasp nest is backlighting individual frames. The cell walls are thin and slightly translucent, allowing light to pass through when illuminated from behind.
By placing a diffused light underneath a loose section, light travels up the sides of the cells and emerges through the openings. This creates the impression that the structure is glowing from within.
Shooting slightly off‑centre is important. A perfectly central viewpoint can flatten the image, while a small angle reveals both the internal glow and the surface texture at the same time.
Balancing top light and bottom light takes experimentation. Small adjustments dramatically change how much translucency is visible.

Although multiple lights offer control, some of the most compelling images come from using a single diffused light. Placed behind or to the side of the cells, a single light creates strong directional shadows while still allowing partial transmission through the structure.
Because no two cells are identical, light behaves differently across the frame. Some areas glow softly, others remain dark, and some reflect light back towards the camera. Moving the light by only a few millimetres can completely change the mood of the image.
This makes the nest an excellent subject for slow, exploratory photography.

Wasp nest macro photography
Abandoned wasp nests offer access to a hidden world. The geometry, repetition, and fragility of the structure reveal how much complexity exists in objects that are usually ignored or removed without a second thought.
With controlled macro lighting and a careful approach, these nests become sculptural subjects. They reward observation, experimentation, and restraint, and they demonstrate how light alone can transform a familiar object into something extraordinary.
Remember to subscribe to our YouTube channel for regular macro photography tutorials, ideas and inspiration.

- CPU Macro Photography – Create Abstract Cityscapes with Light and Detail - 12th July 2026
- Photographing Grains of Sand at High Magnification - 28th June 2026
- Colourful Abstract Macro with a CD – A Fun Shoot to Try at Home - 14th June 2026


