This help article is for Flash Arms purchased before December 2024.
Plugging In
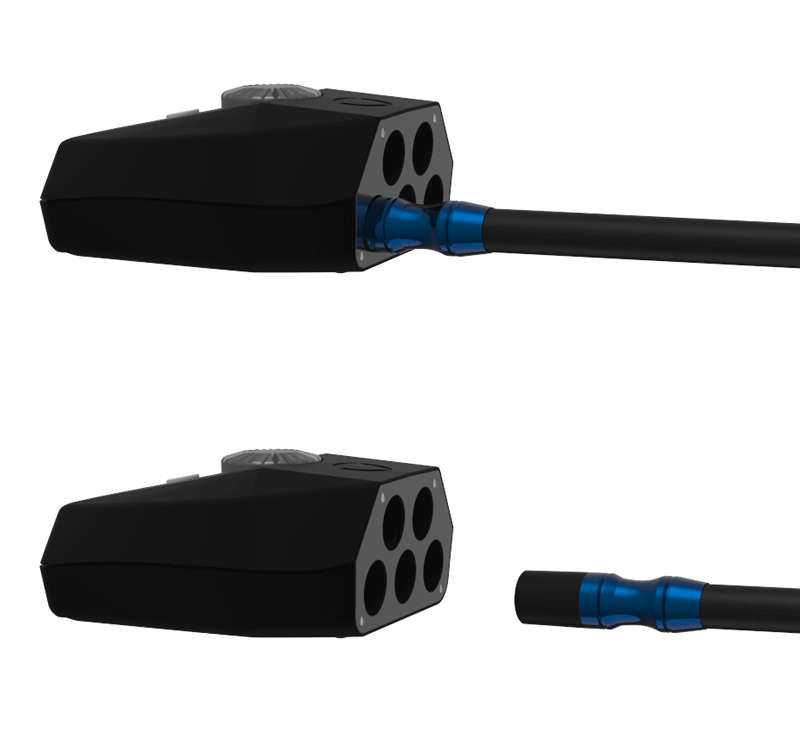
Make sure the contacts of the Flash Lighting Arm and Control Pod are clean and insert an arm into any of the ports on the front of the Control Pod. You will feel a magnetic pull, rotate the arm until it clicks into place.
The arm may need to be rotated slightly to find the lock position. Do not force the Arm to turn once locked.
Ensure boost mode is turned on when using your Flash Arms.
The Flash Lighting Arm will show a green light and charge up once connected, which can take up to 1 minute when first plugged in. The default level the Flash Arm reaches on connection is level 3 on a nominal battery charge, but ultimately the level reached will depend on how well your battery is charged and what other Arms you have plugged in at the same time. If you have a Pod 1.0, the Flash Arm will only charge to level 1.

Manipulating Arms
Flash Lighting Arms are flexible, providing light wherever it is needed in your scene. You can bend arms before inserting them into your pod, or adjust them in situ.
When manipulating an arm while plugged into the control pod, make sure to support the Pod and Flash Arm connection. This ensures there is no excessive force on the Control Pod mount or the Flash Arm connector.
Setting the Flash Level
Just like the LED Arms, use the manual brightness control or app to set the desired flash level you wish to use. There is a guide to which setting to use here. As you adjust the Pod power you will see the red LEDs on the Flash Arm go up and down from 1 to 5. The LED will be half lit as it charges and will be completely lit once that level and charge is reached. Just as with a normal Flash Arm, stop adjusting and leave for 3 seconds and the new flash level will be set.
Triggering Flash Lighting Arms
Understanding the receiving window
To trigger the Flash Lighting Arms you need an Adaptalux Emitter. The Emitter sits on your camera or triggering system and must have a good line of sight with your Flash Arms. Optionally, you can also use the Radio Trigger.
On the bottom of the Flash Arm there is a black circular window, this must not be covered and must be orientated towards the Emitter for a reliable connection. As long as the windows is exposed to a surface that can reflect the IR from the Emitter or is facing the Emitter, you will have a good and reliable connection.
For use outside in bright sunshine, it is very important that the black window is angled towards the Emitter so a good line of sight is established between the Emitter and Flash Arm.
Triggering the Flash Lighting Arms
Fire the Flash Arms
Once the above has been set and the Emitter is connected to your camera and turned on, simply press the shutter button on your camera and the Flash Arms will fire.
Adding Flash Gels and Pro Hoods
To add a flash gel, simply stretch it over the end of your Flash Lighting Arm. To remove it simply pull it back off.
To add a Pro Hood, fit it over the end of a Flash Arm and it will magnetise into place. Pro Hoods can be used with or without Flash Gels.
Removing Flash Lighting Arms
To remove a Flash Arm and turn off the system, just pull the arm directly outwards from the pod. Do not twist the arm, there is no need to twist or “unscrew” the arm.
Push and hold the discharge button for 8 seconds underneath the Flash Lighting Arm once it is disconnected, this will safety discharge any remaining charge in the Flash head.
When there are no arm connected, the Pod will automatically switch off.

Additional Resources
Adaptalux Flash information: Adaptalux Flash
Video Demo and Tutorials – Adaptalux Studio Demo


