


How to photograph miniatures like a pro. – Watch on YouTube
Model making and miniature painting is a hobby that takes a lot of time and discipline. It’s a great feeling to come to the end of a project and admire the final result. However, another skill comes into play if you want to show off your hard work on the internet. Today we will take a deep dive into capturing images of your minis and answer the question of how to photograph miniatures.

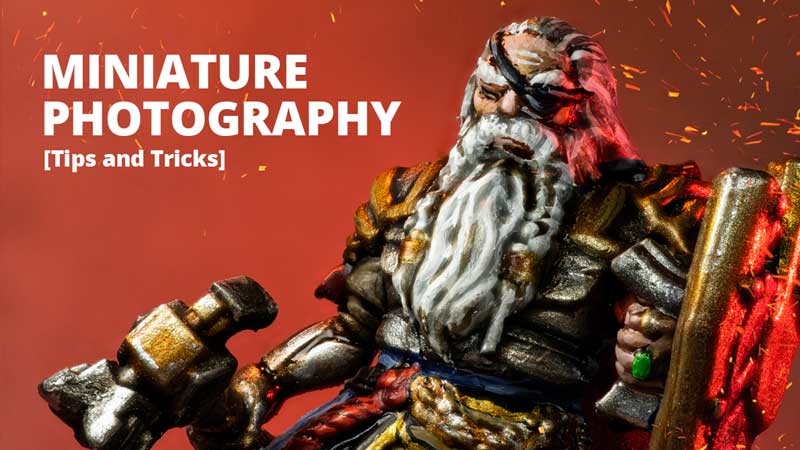
How to photograph miniatures like a pro.
Before we get started, we’re not wargamers or painters, we specialize in macro photography – taking images of really small subjects. Most miniatures and models are much larger than we’re used to, but to the average photographer, taking pleasing images of small objects presents a unique challenge.
So, while we’re not here to boast about the quality of our minis (we didn’t paint them ourselves, thanks to our friend Jamie for that), we know that representing the quality of the build and paintwork is important after all that time spent working on them.
Whether it’s some 3D-printed Dungeons and Dragons characters, the leader of your Warhammer army, or your historically accurate Airfix warships, these tips will help to capture the look and feel of your miniature.

Tip 1 – Background and composition.
The most important tip for showing off any miniature is to make sure it’s the first thing people notice in the photo. This might seem obvious, but the speed and ease of photos often overrule clearing out clutter. Paints, desks, or screens in the background of a photo can be very distracting for the viewer, and detract from your awesome paint job.
Equally, handholding the model can draw the eye to the hands, and not to the artistry. At the very least, try clearing a small space to take a photo on a flat surface with no other visual distractions.


Using a plain light or dark coloured backdrop can really help colours and detail stand out on your miniature. A busy background risks parts of your character getting lost in the colours of whatever is behind it.
A simple piece of white paper, a white desk or a wall can be enough to use as a plain backdrop. Try to choose a colour that contrasts well with the colours on your model. For example, if you have a light colour scheme, try a dark background and vice versa.

Tip 2 – Lighting
When it comes to how to photograph miniatures, lighting is one of the most important factors. Poor exposure or bad lighting can make or break the look of your paints on the model. With access to proper photography lighting for small subjects, you can use light to add some drama and really make your models stand out.
The most important factor, to begin with, is simply getting enough light onto the front of your mini. Two lights pointing at your mini from a 45-degree angle from the camera (either side) would be ideal. This will get enough light onto all the visible angles of your character.

Lighting the Background
After you have light on your miniature, you may find that the background is looking a littletoo grayish. If you are shooting on a dark background, try to reduce the amount of ambiant light hitting the dark backdrop. If you want a pure black background, we have a great article with lots of details on how to achieve that.
For lighter backgrounds, you may need an extra light source to light the background separately. Again, we have a full tutorial on how to achieve white backgrounds, with a simple sheet of white printer paper.

Tip 3 – Cameras and Focus
Not everybody has the latest and greatest camera just to photograph miniatures. Luckily, having a professional camera and lenses is not a requirement if you are just casually showing off your miniatures on Instagram or forums.
With the right lighting and backdrop, you can easily shoot on your phone camera and get great results. Manual settings and attention to detail are still part of the game though. Make sure your phone camera is choosing the right exposure for your character and focusing in the correct spot (usually the face or eyes of a figure).

Using auto exposure and autofocus (especially with very light or very dark backgrounds) may lead to your miniatures looking dull, too bright, or too dark. The camera might try to expose for the entire image, including your deliberately over or underexposed background.
Most modern phones and some cameras can be encouraged to focus and expose for a specific spot. Try giving your miniature a tap on the touch screen interface, it will usually result in the camera focusing and changing exposure for the spot you touch. Failing this, you may need to adjust the focus and settings manually.
For the more advanced…
The steps so far should result in some great-looking images that really show off how to photograph your miniatures to showcase their colours and detail. However, there is more we can do to make your images stand out.

Tip 4 – Depth of field
If you do have a DSLR or mirrorless camera with interchangeable lenses, a macro lens is ideal. It will allow you to get much closer to the detail on your models without sacrificing resolution cropping in later.
When discussing how to photograph your miniatures and paintwork up close there’s another factor that’s often overlooked. Depth of field comes into play much more when using macro lenses. The closer you get, the less of your image will be in focus at once.
This can be particularly noticeable on “deep” models. For example, when a sword extends outwards towards the camera. do you focus on the character or the sword? You may find that you can’t manage both.

Aperture is the main concern here. A small f-number will result in a very narrow depth of field. To increase it, you will need more light and/or different settings. If this means a slower shutter speed, you may want to consider a tripod to hold your camera steady. (If you’re unsure, go ahead and use a tripod anyway, it can’t hurt to keep your images steady!)
Another fantastic option to combat depth of field is focus stacking. It’s an advanced and time-consuming technique but can result in pinpoint sharpness across your entire miniature. If you really want to do your hard work justice, it would be worth taking the time to stack your images. We have a full tutorial on how to focus stack, but to keep it short, it involves taking multiple images while moving the camera or focus though the subject. Images are then blended together using software to pick only the sharpest parts of each image.

Tip 5 – Creative Lighting
So far, we have been talking about how to photograph miniatures for showing off accurate colors and paint jobs. Plain white lighting with a matched colour temperature to your camera will show off your paint colours accurately and let the model speak for itself. However if you want your photo to really stand out, you can use your lighting to add a bit of drama.
There are so many methods to do this, it’s worth experimenting for yourself. Try deliberately balancing the brightness of your lights to create shadows along one side of your character. Lighting from slightly behind can cast a “halo” of light on the edge of the subject, often called rimlighting.

Lastly, it’s really effective to add some colored light. Reds and oranges invoke the feeling of nearby explosions, blues for cold mysterious magic auras, or greens for otherworldly alien glows. We used the colored LED lighting arms of the Adaptalux Studio to place colour and white light exactly where we need it.
The use of light in this way will likely obscure some of your paintwork but might make your miniature feel much more realistic and eyecatching to the viewer.

Tip 6 – Add some effects!

Contrary to Tip 1, it might be worth adding some extra details to your image, either practically or digitally. If you have a collection of minis, you probably have a few bits of scenery too, right? Right… just a few.
Combine some scenery with the other tips in this article. By controlling your depth of field, and advanced creative lighting, you can blend your minis in with surrounding elements to up the realism to max. This is not the way to show off the finer details of your paintwork, but can certainly capture the vibe and overall theme of your miniature.
Add some creative angles, a few more lights, and even some practical effects and you have yourself a cover photo for your next campaign or a propaganda poster for your army. If you don’t want to do it in-camera, some quick additions of digital effects in photoshop can work just as well.

Thanks to Denny for printing the Heroforge D&D characters you see here, and to Jamie for his time spent painstakingly detailing them.
Before you go, make sure to subscribe to our YouTube channel for more macro photography tutorials, ideas and inspiration, including many more tips on model and toy photography!

- Macro Photography with Hot Glue: Alien Egg Abstracts at Home - 29th March 2026
- Adaptalux at The Photography Show 2026 – Our Biggest and Brightest Year Yet - 23rd March 2026
- Needle Macro Photography – How to Capture the Eye of a Needle (10x magnification) - 15th March 2026


