Watch on YouTube – LEGO Photography Lighting with Lasers!
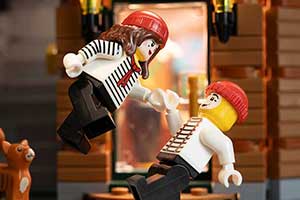
It’s a dark, rainy night in LEGO City, dimly lit street corners have become a haven for crime. Our protagonist waits patiently outside the cinema for his target…

LEGO Film Noir
If you hadn’t guessed by that foreboding intro line, we have been immersing ourselves in the style of “Film Noir”. The gritty, dark genre of film that was popularised in the 40s and 50s and became an icon of the era. Being all about macro and close-up photography, we wanted to shoot our own take on the genre using LEGO!
The aim was to get a film-like shot of our angry mini-figure waiting outside the cinema. To achieve that, we used some interesting techniques!

The LEGO Photography Setup
Similar to our last miniatures shoot using Warhammer 40k, we need to be concerned not only with the foreground, but the background too. To complement our mini-figure, we used 2 modular building sets to create the scene around him. The Palace Cinema, and the Detective’s office (mostly because they match the theme). We wanted to create a street scene for our protagonist to hang out on, so shooting across the secret corner onto a backdrop of more buildings works well.
Bare in mind that when setting up the scene, you don’t need to worry about getting an accurate street layout. You only need to think about what it looks like from the perspective of the camera.
Speaking of the camera, if you would like a shot that looks like you are down at street level, it goes without saying that the camera should be positioned as such. This often requires a separate tripod and a lens that will zoom to the kind of level you want. We used our 90mm Tamron lens to get close, but not “macro close”!

The LEGO Photography Lighting
The most important part of a “realistic” shot like this is always going to be the lighting. Setting up LEGO photography lighting is tricky at the best of times due to the reflective nature of the bricks. Despite this, we have some cool techniques to show you.
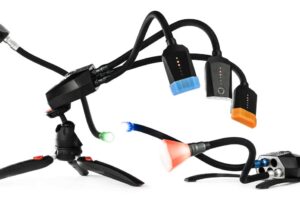
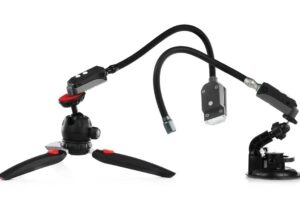
Our aim was to re-create the type of light that would naturally be found in a street. Using the Adaptalux Studio’s flexible lighting arms, we were able to produce light from inside the buildings. Our main light coming from inside the cinema windows.
A second Lighting Arm reaches up to the detective’s office and in through the skylight. Because the background buildings will be out of focus, this provided some much needed detail in the top left of the frame.
Using the Lasers
Here’s where things get interesting. Our Laser Lighting Arms are amazing for making transparent or translucent objects look as though they are producing their own light. Short of fitting LEDs into the street light’s themselves, there is no way to create this effect, without also casting shadows that give the game away.
We positioned 2 Laser Lighting Arms out of sight around the corner. This allowed the invisible lasers to carry light into the translucent bricks of the cinema and the street light.
Balance your light with the lasers refracting inside the bricks, and you can have a very convincing scene set up with no visible light sources!

Film Noir LEGO Photography would not be complete without the iconic black and white look of the era. Of course, you can change the hue of the red laser lights in Photoshop later. But, if you convert to black and white, you can use the difference in colours to adjust the levels of the red lights independently from the rest of the scene.

These LEGO Photography lighting techniques can be applied to a variety of subjects, including the Warhammer miniatures we mentioned earlier. You can also check out our recent post full of subject ideas, if you are wondering what to shoot next!


Please give Camera settings when doing your tutorials. Loved the Lego lighting . Tony.
Hey Tony, the settings for these shots were around 1s f11 and ISO250. The long shutter speed is needed to balance the light of the lasers against the normal lighting arms.