


UV Photography – How does a dandelion react to UV light? – Watch on YouTube
UV Photography is fascinating and not as technical or challenging as you may think. In this UV photography tutorial we will be capturing the classic dandelion shot, with one interesting twist – UVIVF
What is UV Photography?
UV Photography can mean a few things. Today we are practicing something called Ultraviolet Induced Visible Fluorescence (UVIVF) photography. For a quick overview of the different kinds of UV photography, check out our introduction article.
UVIVF Photography involves shining a pure UV light source down onto a subject in total darkness. Certain subjects will glow as a response to the UV light and create amazing colors that emanate from the subject itself. Sometimes this can be seen with the naked eye, but you can see it much more clearly using a camera and lens.
It’s important to note that you don’t need any kind of camera modifications for UVIVF photography. We’re only capturing the visible light created by the subject, not the UV light.
Below you can see how lichen totally changes colour from green to orange under UV light, due to the specific chemicals it is made from.


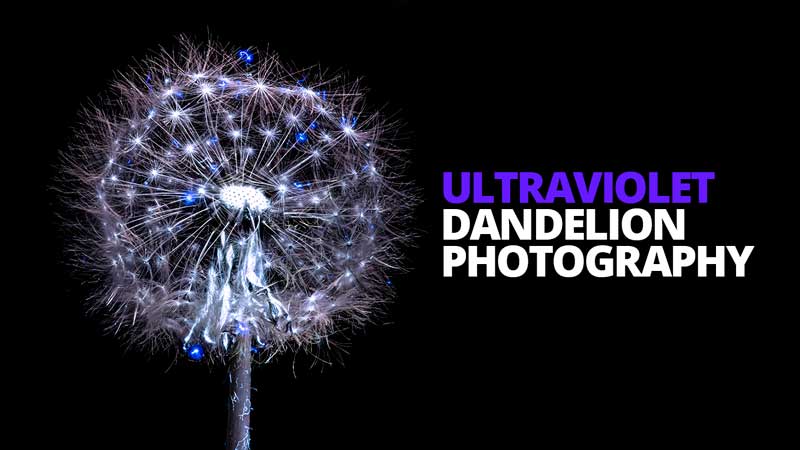
Dandelion UV photography.
So what about our dandelions. Well, under UV, they certainly glow, but interestingly, only certain parts. The center of the flower glows a bright bluish-white and the tips of each seedling also glow.
When combined into the classic sphere of a dandelion clock, this makes a centre with strange glowing lights orbiting it.

To get a better view of the centre of the dandelion, we pinched a few of the seeds off from the front to create a little window to look through. This helps stop the fluffy ends of the seeds from obscuring our view of the details within.
Lighting
To capture true UVIVF photos, you need a pure UV light source. And to properly light a dandelion, that light needs to come from multiple directions. To achieve this, we have used several of our flexible UV Lighting Arms for the Adaptalux Studio.
Although it’s possible to capture this effect using only one arm, more arms will help to achieve better settings and reduce shadows.

Focus Stacking
There’s a delicate balance between our 3 exposure settings, especially with UV Photography. Because there is only a very small amount of light produced by a subject, we need to use a long exposure.
However, if you want more detail, you either need a narrow aperture (for a better depth of field) or lots of images for focus stacking. Previously we have usually opted for a longer shutter speed (20s+) and a narrow aperture. However, with our dandelion, focus stacking captures every little detail.

It all adds up!
Taking dozens of shots at 20s each is going to be very time-consuming, so instead, we are going to open up our aperture, but use that extra light to speed up our shutter speed.
This means we can get a much more respectable shutter speed of 3 or 4s for each shot, and get through our stack much faster. Remember, all of this needs to be done in total darkness, so the less time sat in the black the better!

Our final stacked shots of the dandelion are really interesting. Although the color changes are less dramatic than some other UV photography subjects, it’s still a very unique way to approach a common subject.
Before you go, make sure to subscribe to our YouTube channel for more macro photography tutorials, ideas and inspiration, including many more UV Photography tips and lots of different subjects!

- CPU Macro Photography – Create Abstract Cityscapes with Light and Detail - 12th July 2026
- Photographing Grains of Sand at High Magnification - 28th June 2026
- Colourful Abstract Macro with a CD – A Fun Shoot to Try at Home - 14th June 2026


