Adding batteries
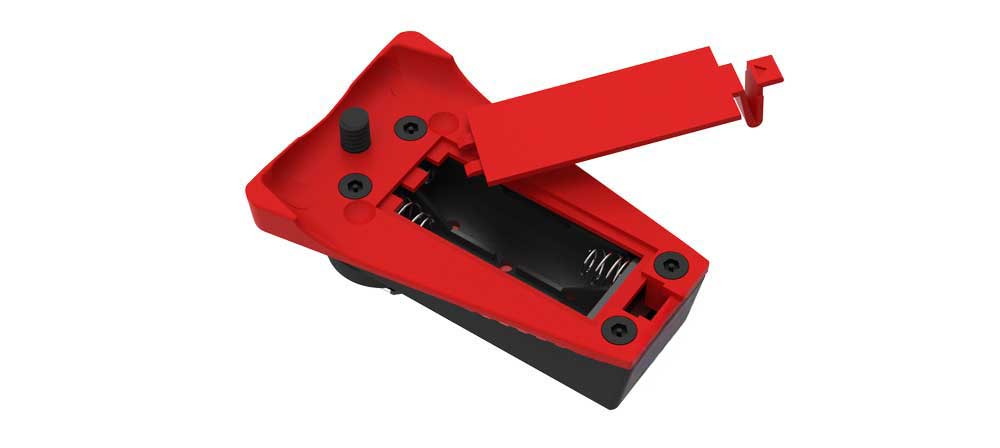
The Adaptalux Trigger uses 2 x AAA batteries. Push into place by simply removing the battery flap, inserting the batteries and re-placing the battery flap.
There is a battery removal tool inside the battery compartment, please lie this down the middle of the inserted batteries for secure storage.
Turning the Trigger on
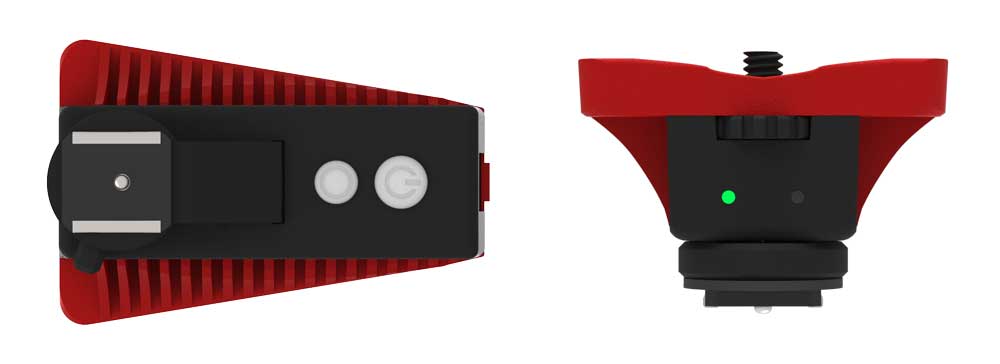
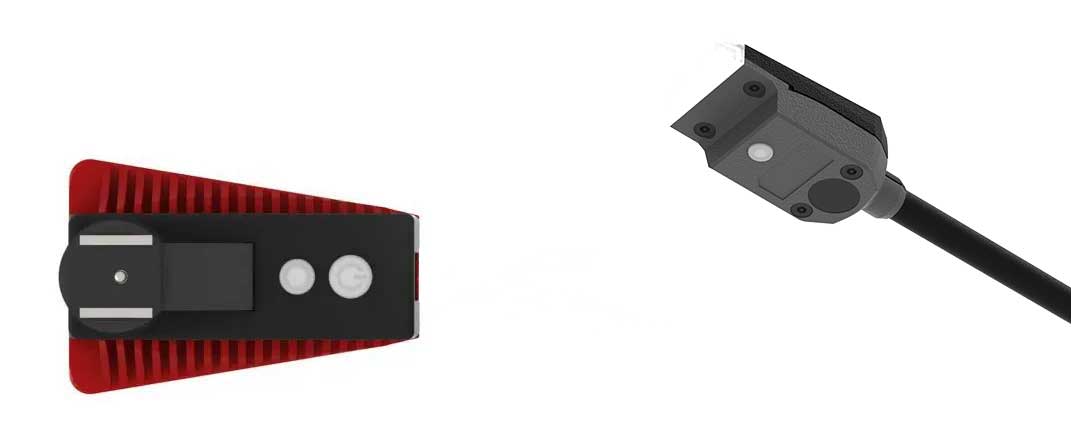
The Trigger has a power button located underneath the product. Simply press once to turn on and once to turn off. A green light will appear on the back when the product is turned on.
(Optional) Attaching the Trigger to your Pod
Place your Adaptalux Pod onto the Trigger and use the tightening wheel to screw the Pod to the Trigger. Tighten until the Pod feels firmly attached. To remove, simply un-tighten the tightening wheel until your Pod comes off the Trigger. Be sure to hold both the Trigger and Pod when doing this. It is important to note that when the Pod is mounted to the Trigger, you should support the Pod with your other hand when adjusting the position of any connected Lighting Arms to reduce any unnecessary forces on the connections between Arms, Pod, Trigger, and Hotshoe.
The Trigger does not have to be used with the Pod mounted to it, they can also be used separately. This can be particularly useful if you are indoors or using a studio set up. This will provide independent movement for your camera and your lighting can remain in place.
Attaching the Trigger to your Camera
The Trigger fits any camera with a hot shoe connection. Slide the Trigger onto your hot shoe and tighten the locking mechanism until the Trigger feels well placed on your camera. Please note the tightening direction marked on the locking mechanism. Ensure the Trigger is slided fully onto your hot shoe to ensure the contact pins are in the right place. To remove the Trigger, un-tighten the locking mechanism and slide back off the camera.
Using the Test button
The Trigger has a useful test button located on the underside of the product. This button can be used to test fire your Flash Arms and ensure they are in range. By pressing it, any connected Flash arms will trigger and fire if they are in range. This can be very useful when setting up a shot.
Low battery indicator
If the batteries are low in your Trigger, a red LED will show on the back. If this LED is showing your Trigger may not trigger the Flash Arms as the batteries need replacing.
Additional Resources
Adaptalux Flash information: Adaptalux Flash
Video Demo and Tutorials – Adaptalux Studio Demo


