Professional eye photography tutorial | Iris photos with no reflections! – Watch on YouTube

In this professional eye photography tutorial, we’re going to cover everything you need to capture iris photos with no reflections!
That may sound fairly simple (if you have never tried it) or practically impossible (If you’re struggling with how to remove those reflections!). Just scroll on down and we will tell you how it’s done!

Professional eye photography
Iris photography is increasingly popular, especially as many Iris photography studios have been established in the past few years. People have become aware of the amazing colour and beauty hiding within our eyes.
You may be wanting to set up a similar Iris portrature business yourself, or simply want to know the method for playing around at home. Either way, let’s cover the equipment setup you will need.

You will need;
- DSLR or Mirrorless camera
This can be any make or model, as long as it has a high resolution and interchangeable lenses. - Macro Lens
A macro lens is very important for getting a close-up image of the eye. At least 1:1 magnification is important and a reasonable working distance of between 20-30cm - Tripod or camera mount
The camera needs to be steady and fixed in position. Don’t hand-hold it, set it up to give yourself time and precision when shooting. - Adjustment rails
Use a manual focus stacking rail to adjust the lateral movement of the camera, and consider vertical adjustments too. You will need to fine-tune the placement of the camera to match the position of the eye. - Lighting
Lighting is the most important factor and the hardest part to get right. You will need 2 very small, flexible light sources. We will talk more about lighting in a moment. - Head Stabilisation
Keeping the head steady is just as important as keeping the camera steady. Lean against a wall, or place the chin on a surface to keep the head in position. If you can get a professional head stand, this will be ideal. - Head shroud
Some kind of box to surround the subject will keep out external reflections and provide some privacy for the person being photographed. This is particularly important in a public area or without control of external light sources.
We put together a simple temporary setup that took all of the images in this article.

Iris Photography Lighting
The most important factor when it comes to this setup is the lighting. Light is important for any kind of photography, but in this case, it’s also a problem. Anyone that has tried to capture the eye before, knows about the reflections.
The curved surface of the eye will reflect any light source that is used to illuminate the iris. This is a problem, as the reflection will cover up details and make the end result much less pleasing. Large light sources like soft boxes, studio strobes and ring lights are totally out of the question, the reflection is simply too big. However, with this method and the right lighting, it’s possible to totally eliminate this reflection.
The placement of your lights is also important. You should aim to get the lights to come from two different directions, ideally opposite from one another. The more central to the eye , the better as lighting from above or below can create reflections of the eyelid and eyelashes. Having a flexible light source is critical to getting this placement right.
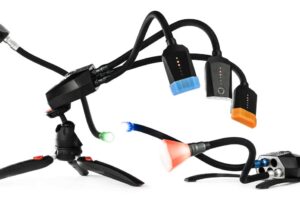
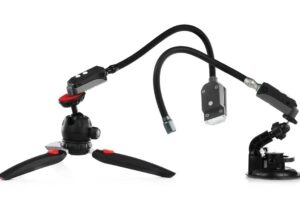
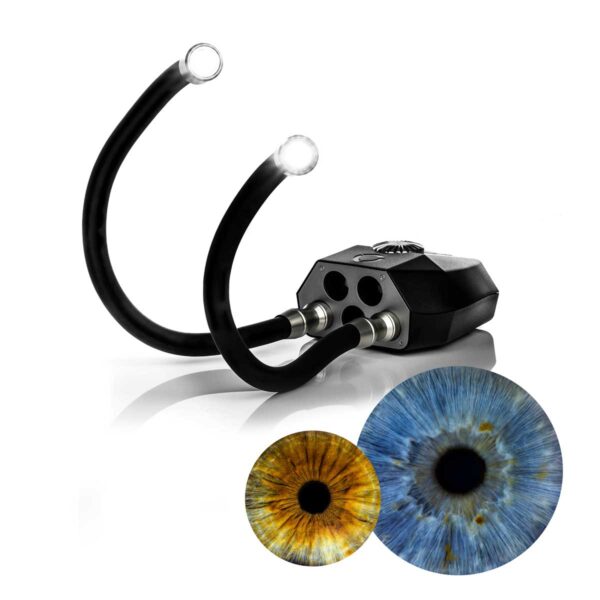
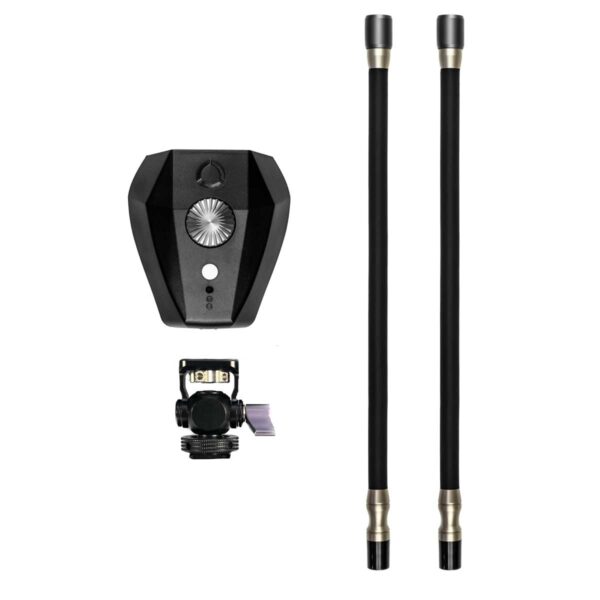
The Adaptalux Studio is the ideal lighting for Iris photography. It’s a lighting system designed specifically for macro photography and perfect for getting light into the right position to photograph the eye. The small, flexible lighting arms are easy to position close to the eye and are powerful enough to get great settings.
There are LED and flash options, but either will work well for Iris photography. For all of the shots in this article, we used 2 LED lighting arms.

Eye Photography Method
Once you have the right light source and a sturdy setup, the method for professional eye photography is relatively simple. Here’s the secret:
We’re taking two photos of the same eye, each lit from a different direction!
This is why we have two lighting arms. We turn one off, take a photo, then switch to the other light and take another. This has the effect of moving the reflection from one side of the eye to the other. Before you start shooting, make sure to check your focus and composition carefully. Even slight movements can take the detail of the eye out of focus again.
The whole process can take only a few minutes. We used the Bluetooth functionality of the Adaptalux Studio to switch between each light smoothly and without having to disturb the setup and subject with our hands. We also made sure to lower the brightness of the lights between each shot for comfort.
Once we have images of the same eye with the reflection in a different place, it’s a simple process to recover the lost detail in Photoshop.


As you can see from the two images above, the reflection has moved from the left to the right of the iris. Now all we need to do is blend them together and remove the reflection.

Post Processing
There is a little Photoshop involved to remove the reflection, but compared to using the clone brush it’s a breeze. There is also the option of using AI to remove the reflection, but we consider this to be cheating. The part of the eye filled in by AI might look right at first glance, but it’s not what the person’s eye actually looks like, just a guess.
Here’s the process we used:
- Edit your raw photos.
Grab both of the images from each set and edit them together. You want them to continue to match as closely as possible with each other. Up the contrast, vibrancy, texture and clarity. It’s ok to go a little overboard and make the colour and details pop! - Stack your images in Photoshop.
Bring your 2 images into Photoshop and drag them into a single file. Allign both of the eyes into the same position. You can do this manually by dropping the opacity of the top layer. Then group both images, you may need to unlock the background layer first. - Use the elliptical marquis tool to select the iris.
Hold shift to make the selection a perfect circle, and drag it across the eye. You may need to transform your selection afterwards. Make sure that the circle is centred on the middle of the pupil. Most eyes are not circular, so don’t worry about cutting out the edges of the iris. - Mask the group.
Hit the mask button with the group selected and the selection will be cut out leaving only the iris and a transparent background. Add a black background layer below the group. Crop the image into a square and adjust the position of the group to centre the pupil and iris in the frame. - Mask the reflection.
Now for the magic part. If everything is aligned properly, you can add a mask to the top eye photo and simply paint out the reflection from that image using the detail from the image below! use a soft brush to hide the edges and make any adjustments needed to the image below to match the brightness and contrast.
Any editing from here on out is optional! You may want to add additional effects or soften the edge where the circle meets the black background. You should now have a professional iris photo with no reflection at all!

Every eye is completely unique and beautiful in different ways and it’s easy to see why iris photography is becoming increasingly popular both as a hobby and a business. Giving someone a well-presented and detailed photo of their eye is a fantastic gift that’s not something that can be captured using your average smartphone!
We hope you enjoyed this professional eye photography tutorial. If you need some lighting to take your own iris photography with no reflections, we have put together an Iris photography lighting pack that has everything you need to get started including 2 flexible white lights, a battery/mains-powered Control Pod, and Bluetooth control for switching between the lights. It’s also great for other kinds of macro photography, read some of our other articles to see what else you can do with great lighting!
Don’t forget to subscribe to our YouTube channel for more macro photography tutorials, ideas and inspiration!












Hi
Looks very exciting.
So that I can get a better picture of the illumination. Is it possible to expose with aperture 16 and maximum ISO 200 at a minimum of 1/125 second?
Many thanks in advance for your prompt feedback.
Hi Sebastian, settings depend heavily on the eye in question along with the lens and setup. The settings we were shooting at were 1/100s f11 and ISO 250
Hello, I would like to know if you make only 2 shots or do you make more for focus stacking?
Where do you focus?
How do you prevent the reflection of the camera from appearing in the pupil?
The idea is amazing, I am preparing to carry it out at home.
Thanks a lot!!
There are only 2 shots taken. There’s no reflection in the pupil as there is no light shining on the camera to reflect.
hallo I need your help I have a big store in Israel
I want to open a bissnes of the photographer eays I want you to help us what to buy to start
Here is the Lighting you need – https://adaptalux.com/product/iris-photography-lighting-pack/
Ben, is there a way you could provide a listing of specific items to purchase, with links? Maybe you could do a low end setup, mid and high? That would be awesome!
The lighting setup is linked in the article, at the moment there are no variations that would be beneficial in terms of low or high end, you just need the Iris Pack – https://adaptalux.com/product/iris-photography-lighting-pack/
bonjour,
je voudrais un renseignement ,quand vous faites une prise de 2 photos de l’iris ( reflet droit et reflet gauche). la position de l’oeil même que la personne bouge très peu n’est pas la même , il y a toujours un léger décalage . lorsque je rassemble les deux par rapport à centrer l’iris central je n’arrive pas à avoir la même position de l’oeil , d’ou a l’assemblage des trait sont décaler.
comment faire pour éviter cela . il suffit que la personne bouge sa tête de peut et il y a décalage.
merci de votre réponse et j’espère avoir été clair.
Panepinto
This is why the head stand is required. I found no such issue when using a head stand to keep the head steady and asking the subject to sit as still as possible, looking at the same point in the camera lens.
Hi Ben can you tell me where you found the chin rest??
The head stand we got was not particularly good, it does the job but is quite cheap plastic for the £100 or so that we paid. It was from AliExpress. I’m afraid I don’t have any better recommendations for that.
Greetings Ben
Excellent page wonderful info; have a few technical questions regarding UV, IR, sclara capture etc!! Is there way to directly converse?
Sincerely appreciate your assistance to further my scientific research project.
Hi Arthur, please feel free to email us at info@adaptalux.com