How to photograph macro subjects behind glass! (Preserved in jars!) – Watch on YouTube

In this macro photography tutorial, we’re exploring how to photograph macro subjects behind glass.
Thanks to the MSc Biological Photography and Imaging course at Nottingham University’s School of life sciences, we have privileged access to some amazing preserved specimens. However, many of them are suspended in liquids, inside Jars!

Photography Behind Glass
You may not be shooting weird and wonderful creatures, but glass presents a problem for many different kinds of photography.
Many of these subjects are very delicate and quite old. This obviously makes it difficult to take the subjects out of their liquids to photograph them properly. The next best thing is to photograph them through the exterior of the jar.

However, it is quite possible to capture clear and detailed macro photos through a glass surface. We have to eliminate reflections and dirt, place our lighting in the right spot, and contend with the depth of the jar.
As you can see from the image above, it’s possible to negate all of these concerns and get a clear image of the subject.
Eliminate Glass reflections in your macro photos.
The biggest issue with glass, is it’s reflective nature. Reflections can appear anywhere, especially if you have a lot of light sources around without being careful. The shape of the glass also makes a big difference, curved glass reflects differently and captures light reflections from much wider angles.
Having a transparent glass or plastic between the lens and your subject is sometimes unavoidable (as with our specimens), but not impossible to overcome.

The trick is to control your light. You must be very deliberate with all light falling onto the glass and subsequently your subject. This includes the elimination of any light sources that you don’t intend to shine on your subject. Turn off overhead room lights, phones or working lights. Leave yourself only with your photography lights.
The photography light also needs to be controllable. You can’t just place it anywhere. You also need to limit the size and direction of the light sources. Using a large softbox will likely result in one or more very large reflections that are not possible to remove.


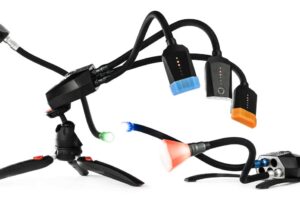
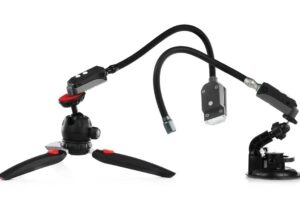
We used the Adaptalux Studio to place our small but still diffused lighting at a strategic angle. In this case, lighting from above from two directions. The light being at such an angle means that the light sources are not reflected into the lens, but the subject inside is still illuminated well.

Particles and prints
Once you have your lighting in a good place with no reflections, the next problems will begin to appear. You will still be able to see any dust, grime or finger prints on the surface of the glass. This may or may not be an issue depending on your subject, but it’s certainly something to keep in mind.
Our jars were very old, so we gave them a good clean before shooting, but even so, there’s only so much you can do! Just be sure to not leave a thumb print in the middle of the glass!

Another issue with these jars of …stuff… is the depth within them. By that, we mean the sediment and pigmentation that has built up within the liquid. It prevents light from penetrating deep into the jar and gives the subjects a hue that is somewhat unavoidable without considerable post-processing.

Sediment and particles floating around inside the cars can also cause an issue with focus stacking. All of the images in this article are focus-stacked, but we found the movement of the particles inside the liquid to be a problem.
You can clone out the streaks caused later on, but by far the best solution is to leave your jar to sit for a long while before shooting. Let all the particles sink to the bottom again and they should be gone from your shot!

So, trying to photograph macro subjects behind glass is tricky, but not impossible! We have to thank the School of Life Sciences at Nottingham University and particularly the team from the MSc Biological Photography and Imaging course for giving us access to their collections and expertise!
Don’t forget to subscribe to our YouTube channel for more macro photography tutorials, ideas and inspiration!
- Winter Macro Photography: Focusing on Tree Bark and Moss Textures - 8th February 2026
- 2024 Winner Announcement – Adaptalux Macro Photography Awards - 30th January 2026
- Dark Cinematic Toy Photography Tutorial – Alien (1979) Action Figure - 25th January 2026


