Abstract wedding ring photography ideas – Put a spin on your Ring photography! – Watch on YouTube

Ring and jewellery photography is usually one of the photography genres that sticks close to the established line. However, we like to look for opportunities to use light and techniques in new ways. In this macro photography tutorial, we have some unique, abstract wedding ring photography ideas that can be used to create a new style of ring photography!

Abstract Wedding Ring Photography Ideas
These spinning abstract ring images aren’t exclusively for wedding rings, but we think it adds an extra personal touch if the ring you’re using is of sentimental value. Everyone knows what a ring looks like, and most wedding rings are fairly similar. But creating some abstract art to show off your ring is something that’s rarely seen.
We think photos like these might be nice keepsakes or gifts, but it’s probably not the kind of shot you want your wedding photographer taking on the big day. Not only does it obscure the details of the ring, but they are quite time-consuming to capture!

Ring Type & Style
Not all rings are ideal for this kind of shoot. You don’t want to use anything with protrusions like stones, or anything with an obscure shape. The ring needs to spin nicely on the spot, and any inconsistencies might make the ring shift off-centre or finish it’s spin too early.
The ideal kind of ring would be a smooth, slightly curved ring. The kind traditionally associated with weddings! A ring like this should spin smoothly for a while, and stay roughly in one place (more on this later)

The Photography Setup
The setup for this kind of shoot is fairly simple and something that can easily be replicated at home. A lot of abstract wedding ring photography ideas require specific equipment or setting but this can be done with any camera on your coffee table!
You will need a camera that can change shutter speeds manually, but most cameras and even phones can accommodate this. A macro lens is helpful if you want to get close up images of the spinning ring, but you can always crop in later.

A tripod is a must as the camera needs to remain stationary and stable while we take a long exposure. Movement of your hands or the scene would not be ideal here so try to keep everything steady.
Lastly, you’re going to need some lighting. Small light sources are best, especially if you can direct them onto the ring without flooding the surrounding area with too much light. Colours are also fun and can add a theme to the images, changing the mood and feel of the ring.

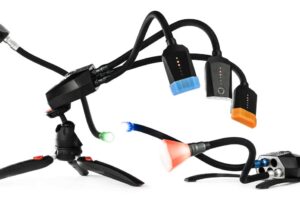
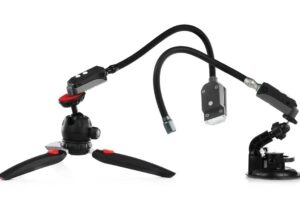
For our multicoloured, multidirectional light, we used the Adaptalux Studio. With interchangeable, flexible lighting arms and clip on diffusion, it’s easy to experiment with different light placements, styles and colours.
Spinning the ring
The tricky part of this shoot is spinning the ring in place and getting it to stay there. The rings usually spin off to one side or move in circles. This can result in different effects, some of which look cool, but are not what we’re trying to create here.

As you can see in the image above, the ring moved side to side, paining the light as it goes. This makes it more abstract and harder to tell that it’s a photo of a ring, but can be a cool effect on it’s own.
The trick to spinning the ring smoothly is not to go for power, but stability. Have the camera ready to shoot on continuous mode, but set at a specific manual focus distance. When the ring spins into the right spot, start shooting!

Camera settings
Camera settings are important to this shoot. We’re shooting long exposures, but the shutter speeds are still relatively short when compared to other kinds of light painting.
Most of the images here were taken at 1/15s (to get the right amount of motion from the spinning ring) F22 (to give a deep depth of field for the whole of the spinning ring) and ISO 100-800 (to balance the exposure from the other two settings)
We would encourage you to experiment with other shutter speeds to have more light trails or less, depending on the speed you spin your rings!

Lastly, try changing the colour, location and diffusion of the lights. Diffused lights create less pinpointed light trails, but look pretty cool all mixed up together!
Smaller or more distant light sources create smaller streaks of light, and colour… well that’s obvious!

Don’t forget to subscribe to our YouTube channel for more macro photography tutorials, ideas and inspiration!


