


Ultraviolet Mineral Photography – Opal, Corundum & Scapolite – Watch on YouTube
Ultraviolet Mineral Photography – Opal, Corundum & Scapolite
Ultraviolet mineral macro photography brings together three fascinating areas of imaging, ultraviolet fluorescence, minerals, and close‑up detail (Macro). When combined, they reveal colours and structures that are completely invisible under normal light. This guide explains how ultraviolet light interacts with minerals, how to set up for this specialist technique, and how to capture clean, bright fluorescence using Adaptalux Studio UV Lighting Arms.

Choosing Minerals for UV Fluorescence
Not all minerals fluoresce under ultraviolet light. Some remain completely unchanged when exposed to a UV source, and others react strongly. For this guide, three specimens were selected because they respond particularly well to the 365nm wavelength produced by Adaptalux Studio UV Lighting Arms.
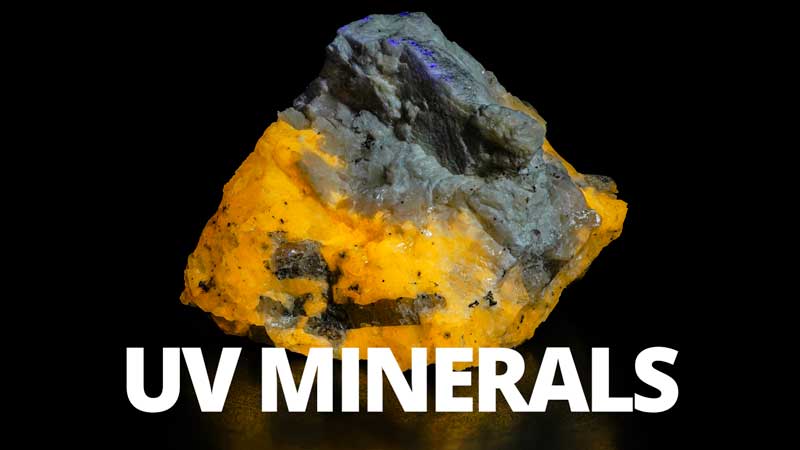
Scapolite appears as a plain grey‑white stone in visible light, yet becomes a vivid orange when excited by UV. Corundum, often seen as uncut ruby, takes on a deep red glow under fluorescence. Rough opal behaves differently again, producing a bright green inner glow due to its transparent structure. These minerals make an ideal first step into ultraviolet mineral macro photography because they emit a strong and easily visible level of fluorescence.
Choosing minerals known to react to ultraviolet light provides the most striking results, and reduces the trial‑and‑error common with less reactive subjects. We can highly recommend Abionfireandice.co.uk for those of you in the UK

Camera and Lens Setup
Macro mineral photography benefits from magnification, stability and repeatable focus. A full‑frame mirrorless camera paired with a 100mm 2x macro lens provides enough working distance to approach the surface closely while maintaining sharpness across the frame.
A focus stacking rail is essential. Minerals have uneven, fractured surfaces that fall quickly out of focus at high magnification. Stacking several images together helps build a detailed final image with depth and clarity. Placing the mineral on a small motorised turntable also adds flexibility. It becomes easy to rotate the specimen to examine each side without physically touching the stone.

Why UV Photography Requires Darkness
Ultraviolet-induced visible fluorescence, or UVIVF, relies on the subject producing its own light. When UV excites the surface of a mineral, it re‑emits some of that energy as visible colour. Any stray visible light in the room will overpower this effect.
For most UVIVF subjects, such as insects or flowers, the glow is too faint to see. Long exposures are needed, and even a small amount of ambient light will wash out the fluorescence entirely.
Minerals are an exception. The three chosen stones glow so brightly that the colour is visible to the naked eye. Even so, the room must be as dark as possible to preserve accurate colour. Curtains should be closed, studio lights turned off, and only controlled illumination from Adaptalux UV Lighting Arms left in the scene.

Using Adaptalux Studio UV Lighting Arms
Pure UV illumination is the most important factor when photographing fluorescence. Many inexpensive UV torches also emit strong blue and violet visible light. This contaminates the image and tints the subject artificially.
Adaptalux UV Lighting Arms emit a narrow, clean ultraviolet wavelength without the unwanted blue spill common in unfiltered LEDs. This ensures the colours recorded in the final image come from the minerals themselves and not from stray visible light.
When the UV arms are increased to full power, Scapolite immediately begins to glow. Reducing or removing white light reveals more of the vivid fluorescence. However, a small amount of visible light can be reintroduced if the subject contains interesting surface details. This helps maintain recognisable texture and avoids creating a flat block of colour.

Balancing Visible and UV Light
With Scapolite, introducing a small amount of white light adds subtle contrast to the grey areas that do not fluoresce. This creates a visual separation between glowing sections and the normal rock surface. A little visubile light will light the impurities that stand out strongly once lit with a gentle visible light.
Opal behaves differently. Its transparency means the green glow radiates from within the stone. A slight highlight on the outer surface helps define its shape and ensures the fluorescence remains readable. Without these highlights, the opal can appear as a single block of green with no sense of depth.
Corundum presents another challenge. Its fluorescence matches the colour of the mineral itself, so adding visible light does not create the same contrast. Although it still glows brightly, the red emission dominates. This makes Corundum a little more complex photographically, but interesting from a scientific perspective because very little energy is lost between absorption and emission.

Camera Settings for UV Mineral Photography
Most UVIVF photography requires long exposures of 20–30 seconds due to low light levels. Minerals, however, allow for far shorter shutter speeds. With strong fluorescence and pure UV lighting, shutter speeds around 1/25s, ISO 3000–4000 and an aperture of f/8 work well. These settings make focusing and stacking much easier than with other UV subjects. Shooting at f/8 provides enough depth to reduce the total number of frames needed in the stack while keeping fine detail sharp.
Because the glow emitted by minerals is bright enough to capture quickly, a large stack can be completed without long waits between exposures. This makes the entire workflow smoother and far more approachable for beginners.

Photographing Three Fluorescent Minerals
Scapolite
Scapolite produces a vivid orange glow that is strong enough to see in normal room lighting. It responds exceptionally well to pure UV and is an ideal first subject for newcomers. Adding a small amount of visible light creates contrast across its impurities.
Opal
Opal glows a brilliant green that seems to originate from within the stone. Its translucent surface makes highlights important. Small reflections help show the viewer that the light is generated internally rather than painted on by an external source.
Corundum
Corundum glows red at nearly the same wavelength as its visible colour. This means it does not shift dramatically in hue, but the fluorescence becomes more intense and saturated. While less visually varied, it offers an excellent example of efficient energy re‑emission.

A Great First UV Photography Project
Ultraviolet mineral macro photography is one of the most accessible ways to begin exploring UV fluorescence. The strong glow produced by these minerals allows for comfortable camera settings, shorter exposures and less strict darkness compared to delicate subjects like plants or insects.
Pure UV Lighting Arms from Adaptalux Studio make the process even more straightforward. Their clean wavelength prevents unwanted colour contamination and ensures that the light captured by the camera comes only from the minerals themselves.
For those interested in exploring further, UVIVF techniques can be applied to many subjects including flowers, leaves and everyday objects that contain naturally fluorescent compounds..
Remember to subscribe to our YouTube channel for regular macro photography tutorials, ideas and inspiration.

- Macro Photography with Hot Glue: Alien Egg Abstracts at Home - 29th March 2026
- Adaptalux at The Photography Show 2026 – Our Biggest and Brightest Year Yet - 23rd March 2026
- Needle Macro Photography – How to Capture the Eye of a Needle (10x magnification) - 15th March 2026


