


Needle Macro Photography – How to Capture the Eye of a Needle (10x magnification) – Watch on YouTube
Needle Macro Photography
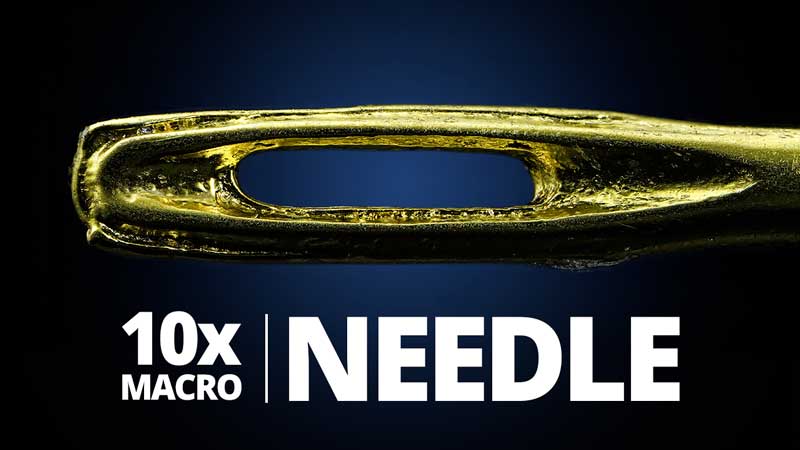
Needle macro photography reveals a surprising world of texture and detail. The eye of a sewing needle is tiny, shiny, and difficult to control. This combination makes it a great subject for pushing the limits of macro and micro photography.
This guide explains how to photograph the eye of a needle with extreme magnification. It covers lens choice, stability, composition, lighting, and focus stacking. The process uses Adaptalux Lighting for clear and controlled illumination of small metal subjects.

Choosing the Right Lens for Micro Magnification
A standard macro lens cannot provide enough magnification for the eye of a needle. To reach this scale, a microscope-style objective works best. The Laowa Aurogon system with 10x to 50x magnification allows close inspection of metal surfaces and tiny openings. Using a 10x magnification is often enough to fill the frame with the eye of a needle while keeping the setup manageable.
The full setup becomes long and front heavy. This weight distribution means the camera body alone cannot support it securely. Mounting the lens using a collar and support rail keeps the centre of gravity stable. This prevents movement and makes precise focus stacking possible.

Stability Is Critical at Extreme Magnification
Even small movements become large when working at 10x magnification. A tiny vibration from touching the camera or table can move the image out of focus. Because the lens has no focusing mechanism, the camera must move instead. Forward and backward motion determines the focus point.
To make this easier, the camera can be mounted on an automated slider. A precise motorised slider moves in micron increments, which is essential for controlled focus stacking. Setting A and B points defines the front and back focus positions. The slider then moves through the scene one micro step at a time, taking a photo at each point.
A small pause between each frame allows vibrations to settle. Using silent shooting prevents the shutter mechanism from adding extra movement. A fast shutter speed, around 1/400s, helps freeze any remaining shake. ISO can increase to balance exposure since the aperture remains fixed on the lens.

Lighting a Reflective Metal Needle
Lighting is the biggest challenge in needle macro photography. A sewing needle is reflective and smooth, so it easily produces harsh highlights and deep shadows. Controlling reflections is essential.
Adaptalux Lighting works especially well for small metal subjects. Super Bright white Lighting Arms placed close to the needle provide controlled, even light. They also allow fine placement around the subject which is important at this scale. Direct lighting alone can still create unwanted contrast, so diffusion is needed.
A simple sheet of soft diffusion material placed over the whole setup spreads the light. This reduces bright spots and gives smoother reflections across the metal. With two Lighting Arms above the diffusion layer, you can still position them independently. Moving each light changes how the texture and curves of the needle are revealed. The result is a balanced and soft illumination across the eye of the needle.
Shooting a Focus Stack
At 10x magnification, depth of field becomes extremely shallow. Even with the smallest numerical aperture, only a thin slice of the needle is sharp in each image. Focus stacking is the only way to capture the whole eye clearly.
The slider takes images automatically as it moves from the front to the back of the needle. A movement of around 3.4 microns per frame provides enough overlap. This creates roughly 100 images in the stack. Each photo captures a slightly different plane of focus, and combining them builds a complete picture.
The final stack can be processed using dedicated software like Helicon Focus. The software looks through all the frames, picks the sharpest parts, and merges them into one detailed image. The resulting photograph shows the eye of the needle with clarity that is impossible to get from a single shot. Fine scratches, curves, and textures become visible across the metal surface.

The Results of Needle Macro Photography
Once the focus stack is complete, only light post‑processing is needed. Adjusting contrast and removing strong highlights can refine the final image. The main work happens during the lighting and shooting stages.
At these magnifications the technique moves beyond traditional macro photography. It becomes micro photography because of the extremely high level of detail. Microscope objectives behave differently from normal lenses, and the setup needs more stability and planning. The process is slow but rewarding. It reveals details that are usually invisible to the naked eye.
Needle macro photography is a fascinating challenge. It combines careful subject placement, precise lighting, and advanced focus stacking. The Adaptalux Studio makes lighting easier by giving soft, controllable light for tiny reflective objects. With the right setup and a steady workflow, capturing the eye of a needle becomes an achievable and enjoyable project.
Remember to subscribe to our YouTube channel for regular macro photography tutorials, ideas and inspiration.

- Macro Photography with Hot Glue: Alien Egg Abstracts at Home - 29th March 2026
- Adaptalux at The Photography Show 2026 – Our Biggest and Brightest Year Yet - 23rd March 2026
- Needle Macro Photography – How to Capture the Eye of a Needle (10x magnification) - 15th March 2026


